Sending Emails in Node.js using Nodemailer
A Complete Guide to Nodemailer for sending emails in Node.js


In Today’s Article, I will explain how to send e-mails from your Node.js server with the use of a library named “Nodemailer”.

Set up your Express.js Server
Open your project directory and run the below commands to set up your node+express server. You can use either npm or yarn package manager, I am using npm here.
npm init -y
This will initialize your Node.js project.
npm i express cors
This command will install Express and Cors for your server.
Now create an index.js file which will be your main file and paste the below code:
const express = require('express');
const cors = require('cors');

const app = express();
const port = 3000;

// Use the cors middleware to enable CORS for all routes
app.use(cors());

// Use the express.json() middleware to parse JSON data from requests
app.use(express.json());

// Define a sample route
app.get('/', (req, res) => {
  res.send('Hello, Express server is up and running!');
});

// Start the server
app.listen(port, () => {
  console.log(`Server is running on port ${port}`);
});
Then run:
node index.js
This will start your server on port 3000, you can check if your server is running by going to http://localhost:3000/ , if your server is working then you should see the below message on your screen:


Installing and Using Nodemailer
Now that you have your Express server up and running, it's time to install nodemailer which we will use to send emails. Run the command below:
npm install nodemailer
This will install nodemailer as a dependency in your Node.js project. Now require it in your index.js in a const variable below const express shown below:
const nodemailer = require('nodemailer')
Testing with a Test Account
Now that you have installed nodemailer, we will try sending emails with nodemailer with a test account first before using our gmail account. For that, you have to create an API endpoint in your server and define a few things
app.post('/testingroute', async (req, res) => {

});
Inside the route, you have to define 2 things, a transporter and a test account for which nodemailer provides functions
// This will create a test account to send email
let testAccount = await nodemailer.createTestAccount();

// This is a transporter, it is required to send emails in nodemailer
let transporter = nodemailer.createTransport({
        host: "smtp.ethereal.email",
        port: 587,
        secure: false,
        auth: {
          user: testAccount.user,
          pass: testAccount.pass,
  }
});
Now you have to define your message which will go to your email, i have given a sample of how to do it, feel free to edit as you like it.
let message = {
   from: '"Fred Foo 👻" <foo@example.com>', // sender address
   to: "bar@example.com", // list of receivers
   subject: "Hello ✔", // Subject line
   text: "Hello world?", // plain text body
   html: "<b>Hello world?</b>",
};
and now the only thing left is to send an email, the transporter is used here, and the full API endpoint will look like below :
app.post('/testingroute', async (req,res) => {

    let testAccount = await nodemailer.createTestAccount();

    const transporter = nodemailer.createTransport({
        host: "smtp.ethereal.email",
        port: 587,
        secure: false,
        auth: {
          user: testAccount.user,
          pass: testAccount.pass,
        }
      });

    let message = {
        from: '"Fred Foo 👻" <foo@example.com>', // sender address
        to: "bar@example.com", // list of receivers
        subject: "Hello ✔", // Subject line
        text: "Hello world?", // plain text body
        html: "<b>Hello world?</b>",
    };

    transporter.sendMail(message).then((info)=> {
        return res.status(201)
        .json({
            message: "you should receive an email!",
            info: info.messageId,
            preview: nodemailer.getTestMessageUrl(info)
        });

    }).catch( error => {
        return res.status(500).json({error});
    })

});
To test this API endpoint, I am using Postman, you can use whatever you want, below is an image for your reference of how to test it using Postman
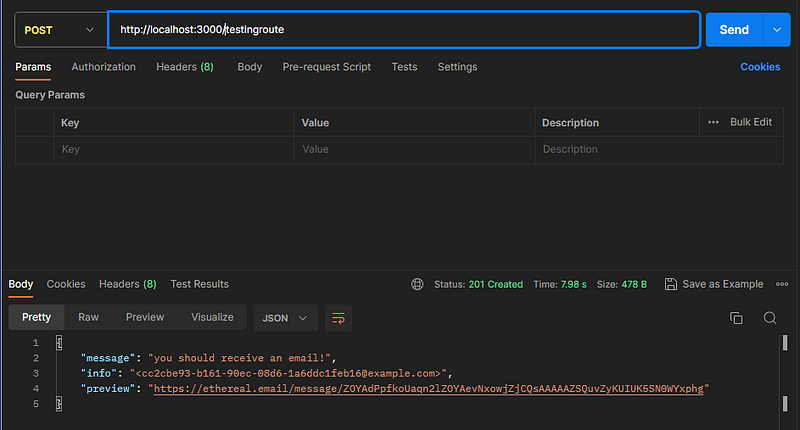
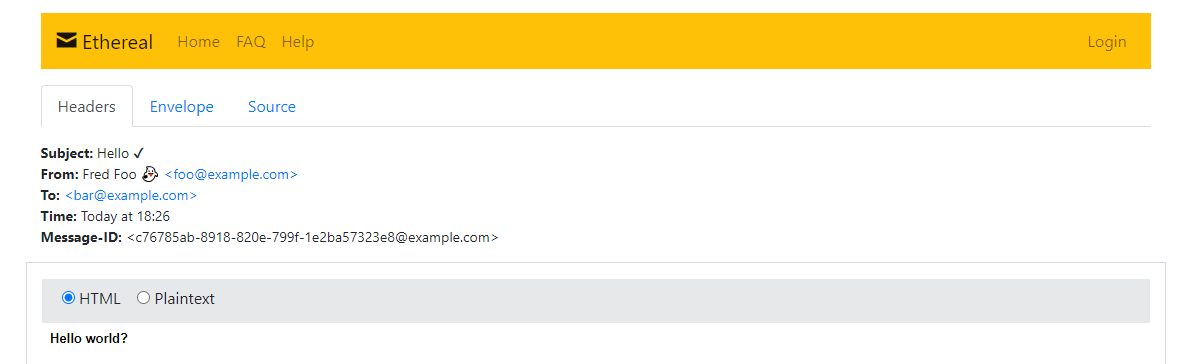
Now you have to go to the URL you will get in a preview of your API response as in the image above and you will be able to check the mail received in test account as below:
Now that you have seen how nod emailer works and how to test it using a test account, it's time to put our Gmail account and send real emails to users from our Node.js server.
Sending Emails using Gmail
For sending emails using Gmail we have to set up a new route, let's call it signup, here I will use a library called Mailgen to send professional-looking emails, you can install it using the command below:
npm install mailgen
and require it as we did for Nodemailer,
const Mailgen = require('mailgen');
Now set up your new route signup,
app.post('/signup', async(req,res) => {

})
Here you have to define a few things you can send emails, so understand this carefully
let config = {
    service: 'gmail',
    auth : {
        user: '', //please put a gmail id
        pass: '' //please create an app password for gmail id and put here
    }
}

let transporter = nodemailer.createTransport(config);

let MailGenerator = new Mailgen({
    theme: "default",
    product: {
        name: 'Mailgen',
        link: 'https://mailgen.js/'
    }
});
config is where you have to put your Gmail account and password, if you don’t want to put your password, you can go to your Gmail account settings and generate an app password and put it here too. Check out this article to do so https://support.google.com/mail/answer/185833?hl=en
transporter is the same as in testing just that here it uses your gmail server.
and the new thing is MailGenerator, it is a great library to create and send professional-looking emails. You can learn more about it here.
Now you have to create a template response for your email to be sent to the user and give it to MailGenerator and the rest of the part is the same as in the testing route.
let response = {
        body: {
            name : "Daily Tuition",
            intro: "Your bill has arrived!",
            table : {
                data : [
                    {
                        item : "Nodemailer Stack Book",
                        description: "A Backend application",
                        price : "$10.99",
                    }
                ]
            },
            outro: "Looking forward to do more business"
        }
    }

let mail = MailGenerator.generate(response)

let message = {
        from : , // Give your email address
        to : yourmail@gmail.com, // give an email id
        subject: "Place Order",
        html: mail
}

transporter.sendMail(message).then(() => {
        return res.status(201).json({
            msg: "you should receive an email"
        })
}).catch(error => {
        return res.status(500).json({ error })
})
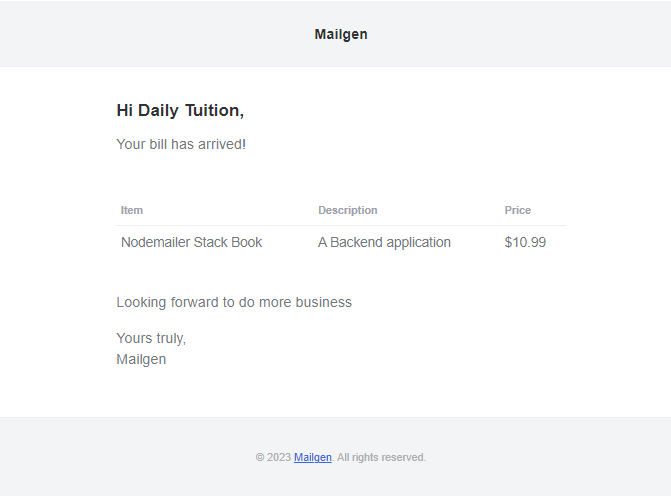
So everything is done, Now is the time to test your API endpoint as we did with the test account, If you have followed the article carefully your users will receive email as below
Conclusion
In this article, we delved into the world of email communication within the Node.js environment using the powerful Nodemailer library. We embarked on a journey that covered the essentials of setting up Nodemailer, crafting and sending emails, test accounts, and even exploring advanced configuration options with our own Gmail account.
As developers, we understand the significance of effective communication in today’s digital landscape. Leveraging Nodemailer empowers us to seamlessly integrate email capabilities into our applications, enabling us to reach users with essential information, notifications, and personalized content.
Thank you for reading! If you have any feedback or notice any mistakes, please feel free to leave a comment below. I’m always looking to improve my writing and value any suggestions you may have. If you’re interested in working together or have any further questions, please don’t hesitate to reach out to me at fa1319673@gmail.com.