How To Create A Discord Bot

I am a Fullstack Developer from India and a Tech Geek. I try to learn excting new technologies and document my journey in this Blog of mine. I try to spread awareness about new and great technologies I come across or learn.
Discord bots have become an integral part of the gaming and online communities, providing valuable functionalities and enhancing the overall user experience. In this tutorial, I will walk you through the process of creating your own Discord bot from scratch. Whether you’re a beginner or have some programming experience, this guide will help you understand the basics and guide you towards building a powerful bot that can perform various tasks.
Prerequisites:
Discord Account and own server or any server where you have manage priviledge.
Basic understanding of Node.js
Any Code Editor like VS Code.
So this tutorial will be broadly divided into two parts, first is creating your Discord Application and then building your Bot’s functionality through code*.*
Creating Your Discord Application
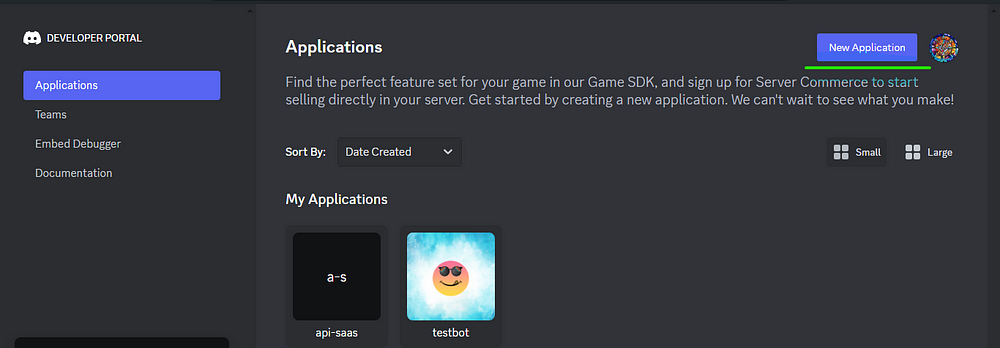
Let’s first head over to Discord Developer Portal where you will create your application by “New Application”.
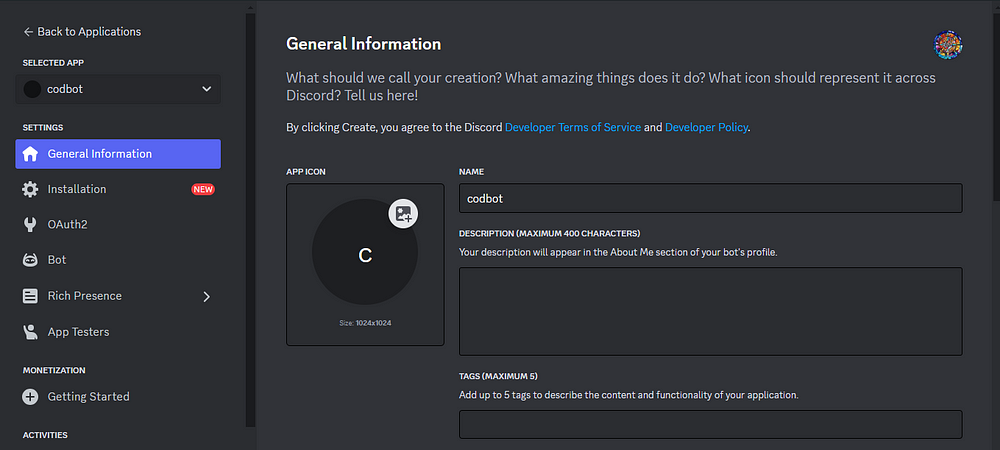
Then enter the name for your Bot whatever you like and click on “Create”.

It will take you to below page where you can add image, description,etc to your Application.
Then under the “OAuth2” tab select bot from choices like below:
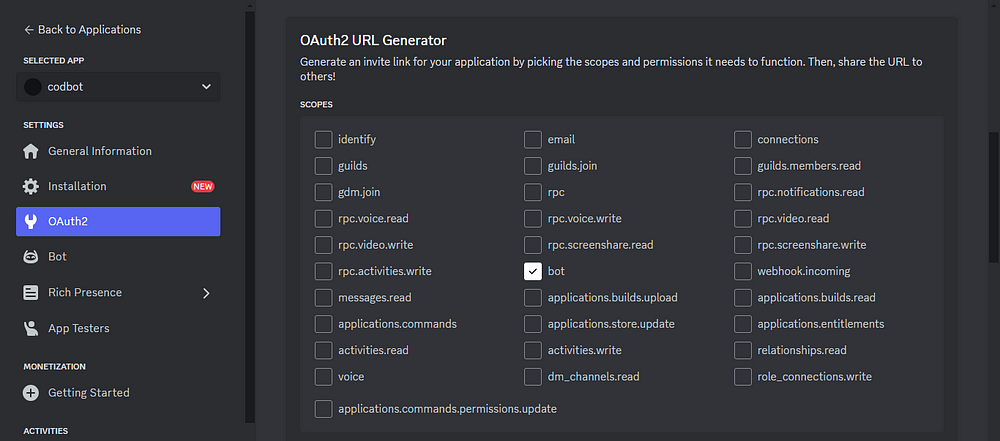
Now scroll further down where we choose the bot permissions, we are then prompted to check off any permissions we wish to give our bot.

This will generate a URL below at the bottom which you have to copy and paste on a new tab.

This will take you to a page where you can add your bot to whatever server you want like I am adding it to my own and press “Continue”.
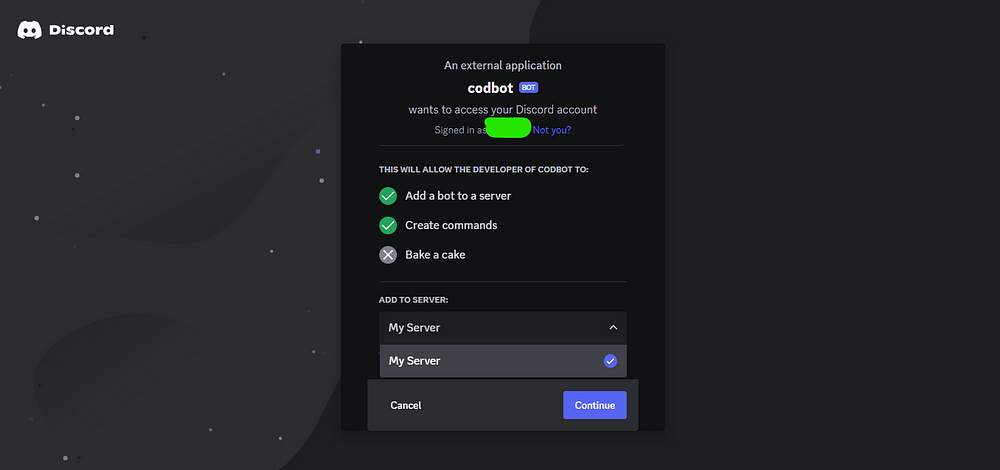
After selecting a server, we will follow the prompts. Once our bot is authorized and we are ready to close the window/tab, we’ll hop over to the Discord server to confirm the action was a success.

Building Functionality To Your Bot
Now that you have successfully created your application, let’s give some functionality to see how it works, so open your code editors and start. Here I will be using Node.js but you can choose any language or framework you are comfortable with.
Step 1 : Create Your Project Directory
Create a folder and add a file called “discordbot.js” inside it.
Step 2: Add Auth Token and Node Packages
The discordbot.js file will hold the code for our bot’s functionality and the .env file will securely store the secret token you can copy from your applicatoin.
CLIENT_TOKEN=PasteYourTokenHere
With npm, Node enables us to use open-source code packages in our projects. Numerous excellent npm packages are available.
Two packages will be installed: dotenv, which enables us to load environment variables from the .env file we created, and discord.js, which lets us communicate with the Discord API. In this case, using a .env file is preferable since we want to protect our token.
npm install discord.js dotenv
Our project should now have the two files we originally created in addition to the three folder/file(s) generated from the node package manager installation:
node_modules folder
package.json file
package-lock.json file
Step 3: Log In Bot and Add Functionality
We will now create some functionality for our bot. In order to do so, we need to first require and initialize the modules we installed via npm.
In discordbot.js:
// Initialize dotenv
require('dotenv').config();

// Discord.js versions ^13.0 require us to explicitly define client intents
const { Client, Intents } = require('discord.js');
const client = new Client({ intents: [Intents.FLAGS.GUILDS, Intents.FLAGS.GUILD_MESSAGES] });

client.on('ready', () => {
 console.log(`Logged in as ${client.user.tag}!`);
});

// Log In our bot
client.login(process.env.CLIENT_TOKEN);
If we run discordbot.js in our terminal, our bot should come online in the discord server, and we should see the following message logged to the console (bot number will vary):
node discordbot.js
Logged in as discordBot#0000!
Add Functionality to Discord Bot
Let’s set up a bot reply for whenever a user types “Hello”.
client.login(process.env.CLIENT_TOKEN);

client.on('messageCreate', msg => {
// You can view the msg object here with console.log(msg)
 if (msg.content === 'Hello') {
   msg.reply(`Hello ${msg.author.username}`);
 }
});
In the newly added lines of code, the bot is listening for a message on the server. If the content of that message equals the string “Hello,” our bot will reply “Hello” back with the author’s username.
Let’s relaunch our bot with node discordbot.js and type “Hello” into the Discord chat. You will see that the bot will reply with “Hello Yourname”.
Conclusion
There you have it! You’ve built your first Discord bot using Node.js, taking a fun first step into the exciting world of bot development. This is just the beginning — you can now explore more complex commands, features, and integrations to make your bot truly unique and valuable for your Discord server. Don’t hesitate to experiment, have fun, and leverage the vast resources available online, including the comprehensive Discord.js documentation and vibrant bot creation communities. Remember, the possibilities are endless — so get creative and unleash the power of bots in your Discord community!
References : Build a Discord Bot with Node.js
Thank you for reading! If you have any feedback or notice any mistakes, please feel free to leave a comment below. I’m always looking to improve my writing and value any suggestions you may have. If you’re interested in working together or have any further questions, please don’t hesitate to reach out to me at fa1319673@gmail.com.


